ChicBeautyTips.com:  What's With All The Makeup Brushes?

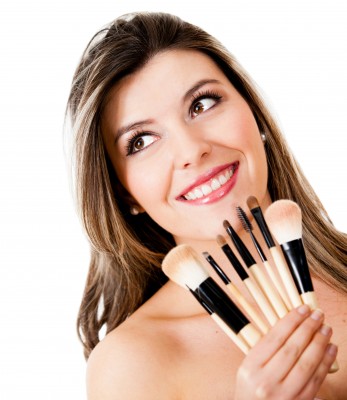
Have you ever wondered what all the different makeup brushes are used for? It doesn’t  have to be complicated to understand the different types of makeup brushes and their various uses. Today we will  take a closer look at some of the common brushes that you may find in your local beauty store.
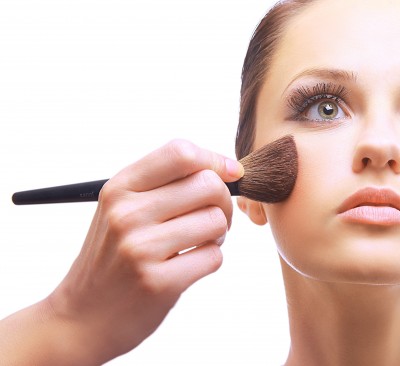
Blush Brush

Has large, fluffy and usually very soft  bristles used for applying blush to the apples of your cheeks to give you a healthy, radiant glow.

Eyeliner Brush

Has small angled bristles, used for apply eyeliner, such as gel eyeliner to places such as your waterline, or to you upper lash line. Sometimes with an eyeliner brush you can use it to apply a bit of eyeshadow to the same way you would apply eyeliner.

Eye Shadow Brush

Has short and rounded bristles. This type of brush is used for applying eyeshadow to your eyelids. Because you may want to use more than one color when applying your eyeshadow, it can be very handy to have more than one eyeshadow brush, unless you want to have wash the brush in between applying different shadow colors.

Concealer Brush

Looks very similar to the eyeshadow brush. The one key difference is that the eyeshadow brush has a slightly wider and more blunt shape. One other difference, is that the concealer brush has a slightly tapered end, while the eyeshadow brush has a more flat tip. In addition, the concealer brush has little bit more dense and stiff of bristles. The concealer brush is used for applying concealer to imperfections, such as blemishes, or under eyes circles.

Lip Brush

Has short bristles and a tapered end, used for precisely applying lip color such as lipstick or lip gloss directly to the lips.

Contour Brush

Can lot a bit like a blush brush, only this type of brush is has angled bristles that are used for contouring, places such as your cheekbones.

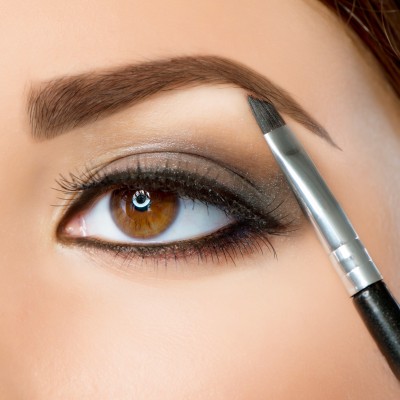
Lash and Brow Grooming Brush

This sometimes double-ended brush has two sides each with a very different use. One side  has long, stiff bristles, used for grooming your eyebrows. The other end is used on you lashes, it is shaped  like a mini comb. It can be used to separate your lashes after you apply your mascara. Also it can be good for gently removing the clumps from your mascara wand, making you mascara application much neater.  

A Guide To Creating The Perfect Eyebrows

ChicBeautyTips.com:  Creating the Perfect Eyebrows

Shaping eyebrows can be a difficult task, and it’s not always easy to achieve the look you want. This season fashion is not just about getting the right clothing, makeup is a huge part of creating a look that is no trend. This year eyebrows are being focused on more than ever. They are the defining characteristic of any woman’s face. The slightest miscalculation can lead to a catastrophic disaster that you end up regretting. It’s truly not as hard as one would think. All you have to do take into consideration these three things: the shape of your face, the length from the edge of the nose to the brow line, and the direction of hair growth.

The Shape of Your Face
In order to get the perfect brow line, you have to know your individual face shape. Oval shaped faces are best to stick with the natural curve and arch it slightly, but not too much. Round faces should keep the eyebrows as high as possible and shaped straight up and down.It gives the effect of the face being longer. Oblong faces should have very little arch, and be swept straight across while adding a slight curve at about 3/4 of the way down. Square face shapes should have an arch, but they need to be on the thicker side to balance your strong features. Making the brows to thin will put emphasis on the lines of your face. Heart faces should go with a soft arched look, but be careful not to pluck too much. Over plucking will give the result of a surprised look.

The Length from The Edge of The Nose to The Brow Line
In order to get the perfect measurement and length for your eyebrows, it’s important to measure from the sides and edge of your nose to the beginning and ending of the eyebrow. Take a pencil and line it up straight with the edge of your nose. This place is where your eyebrow should begin. The second step arches the pencil over the brow line to end with the pencil touching the edge of the nose at about a 45 degree angle. Your brow line should end on the brow bone. You can feel it by pressing lightly on the ends.

The Direction of Hair Growth

Going against the direction of the growth of hair can be painful, and can result in uneven plucking. It’s easier to grip the entire root when you go with the growth. Getting the whole root is important to ensure that you won’t have to pluck quite as often.

Tweezing eyebrows can be beneficial to the way you present yourself in appearance. Ways of maintenance are threading, tweezing, or waxing (recommended to be done by professionals). It’s important to keep up maintenance, but make sure you don’t over pluck. Plan on once every three weeks, so that you allow the hair to grow that is essential to your eyebrow line. Don’t bother with the magnifying mirrors because no one will be able to see those fine hairs that appear. Your look is uniquely yours and yours alone. Your eyebrows will help to express that fact. Shaping eyebrows can be a difficult task, but it’s well worth it.

A Beginner’s Guide: How To Dye Your Hair

There are so many different types of hair dye on the market, but the majority of them are all designed to work in the same way. While the industry is growing at a staggeringly fast rate, there are many people, both men, and women, who are hair coloring virgins. There are several key steps to follow during any hair dyeing process, and if they are completed correctly you’re sure to get a brilliant color, even if you’re just a beginner.

ChicBeautyTips.com:  How To Dye Your Hair

Helpful Hair Dye Hints

To start with, it’s important to prepare your hair for the onslaught of chemicals it is about to undergo. To do this, you should be sure to give your head a nice wash with a well-balanced shampoo – if you can get your hands on a pre-coloring shampoo, even better. These shampoos will allow the hair to obtain an optimum acid balance level, allowing the dye to work at the peak of its efficiency. While every brand recommends you apply hair dye differently, in general, it is a good idea to comb the coloring into the hair until it becomes extremely frothy. This means that the dye pigments will have made their way fully into the hair for the best final effect. Leaving the hair dye in for the required time is very important, and these times will vary dependent on the brand. Typically, between 15 and 30 minutes is a good recommendation.

Finalising The Dyeing Process

When the dye setting time has passed, it’s time to wash off the remainder of the chemicals in order to reveal your final color. Remember, if you’re using permanent or semi-permanent products such as La Riche Directions or Manic Panic, they have the potential to stain your clothing, bathroom units, and skin, so make sure you’re using the correct positioning and movements to avoid this happening if at all possible. Rinse your hair away from your face with warm (but not hot) water, until you believe you have removed all remaining dye from your hair strands. You will then be left with the final color, however, it’s best not to judge it either way until your hair has dried. Colours look different based on the level of moisture in your hair, so until you’ve seen your final color with your hair dry, don’t get too excited or worried about the shade. Finally, here are some short but very helpful tips which you may find useful during your coloring experience:

  • Use vinyl, plastic or rubber gloves when applying hair dye to avoid staining your hands.
  • Perform a strand test before coloring your whole hair if you are concerned about the color.
  • Use Vaseline around your hairline to prevent the color staining your forehead skin.

To Blush Or Not To Blush

Back in the day, no makeup routine was complete without a dose of hot pink blush. The modern world has changed all of that though, with most women rarely using rouge to accentuate their cheeks. Blush can be a beneficial makeup solution, but only if it is applied correctly. Otherwise, it can make a great face look like a bad mask in an instant. Here are some rules to follow when using blush so you can make it work to your advantage.

ChicBeautyTips.com:  Blush


Choose the Right Color

The color of your blush is going to have a huge impact on how your face looks as a whole. If you use something too dark, you’re going to look like you don’t know what you’re doing. If you get something that’s too pink, you’re going to look like a clown. Light peach colors work well on most skin tones, as do pale mauves and creamy rose colors. Just avoid the burgundy and magenta blush you may see on shelves. Neither of those are going to accentuate your cheeks correctly.

Build the Right Foundation

Your blush isn’t going to look good if the skin underneath it isn’t clear. You need to get rid of any blemishes you have on your face because the red tones in the blush will easily bring those out. Clean your skin on a regular basis and use microdermabrasion to get rid of the dead cells on the surface. When you have a smooth complexion to build on, any makeup you use will look great.

Use the Right Brush

Even though most blush products come with small, thin brushes to use, you need to try something that is large and fluffy. Big round blush brushes create softer application areas, which look more natural than the ones with the thin brushes. If you are using cream blush, you might be able to apply that with your fingers. Just make sure you really work the blush into the skin so that it doesn’t look like war paint. The last thing you want is an artificial line right across your cheek bones.

Pick the Right Occasion

You don’t need to wear blush all the time. If you want to leave it off for work or running errands, you’re allowed to do that. Then you can apply it for a big night out when you want to look as dolled up as possible. Focus on finding the right application for you, and you might be surprised by what blush can do.